> ## Documentation Index
> Fetch the complete documentation index at: https://docs.axoma.ai/llms.txt
> Use this file to discover all available pages before exploring further.
# Quickbooks
Quickbooks Tool Integration Setup Guide for Axoma
This QuickBooks Online tool offers a comprehensive suite of financial automation capabilities designed to streamline invoicing, vendor management, and purchase order workflows. It supports end-to-end invoicing operations including creating, retrieving, listing, updating, voiding, and deleting invoices allowing seamless control over billing processes. For vendor and bill management, the tool enables creating and fetching vendor records, listing all vendors, identifying accounts payable details, locating unpaid bills, and quickly selecting recent bill IDs for processing. Additionally, robust purchase order functions allow users to list, retrieve, create, update, and delete purchase orders with ease.
## 🔹 Step 1: Create a workspace in Intuit developer portal.
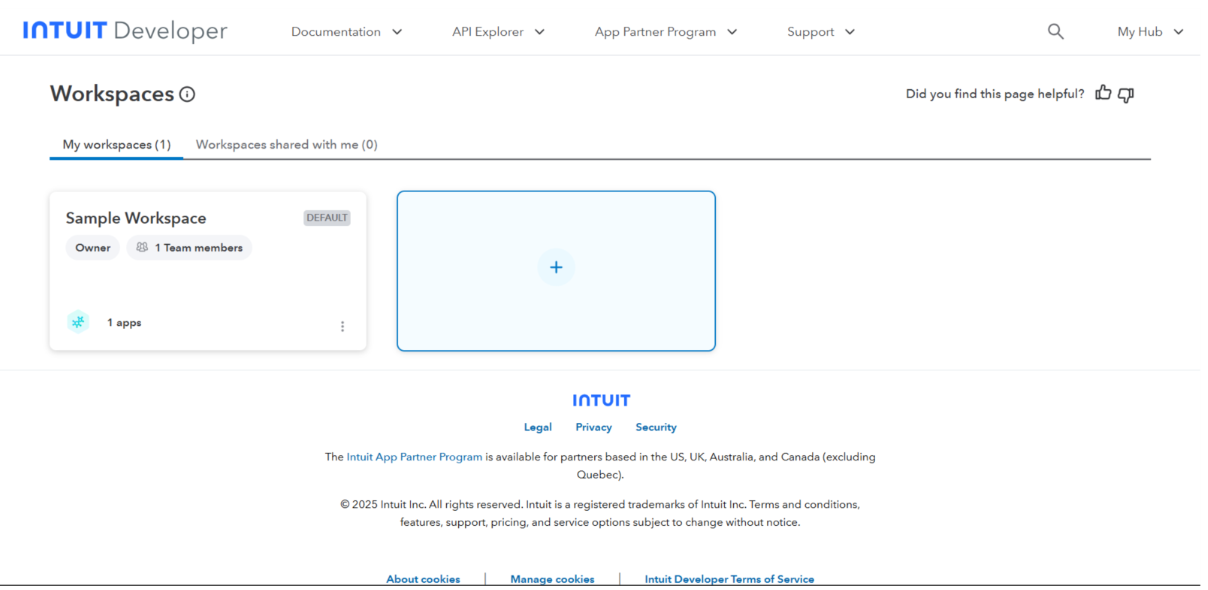 1. Go to: [https://developer.intuit.com/app/developer/homepage](https://developer.intuit.com/app/developer/homepage)
2. Login in with your creds.
3. From top right corner select my hub --> workspaces --> +
1. Go to: [https://developer.intuit.com/app/developer/homepage](https://developer.intuit.com/app/developer/homepage)
2. Login in with your creds.
3. From top right corner select my hub --> workspaces --> +
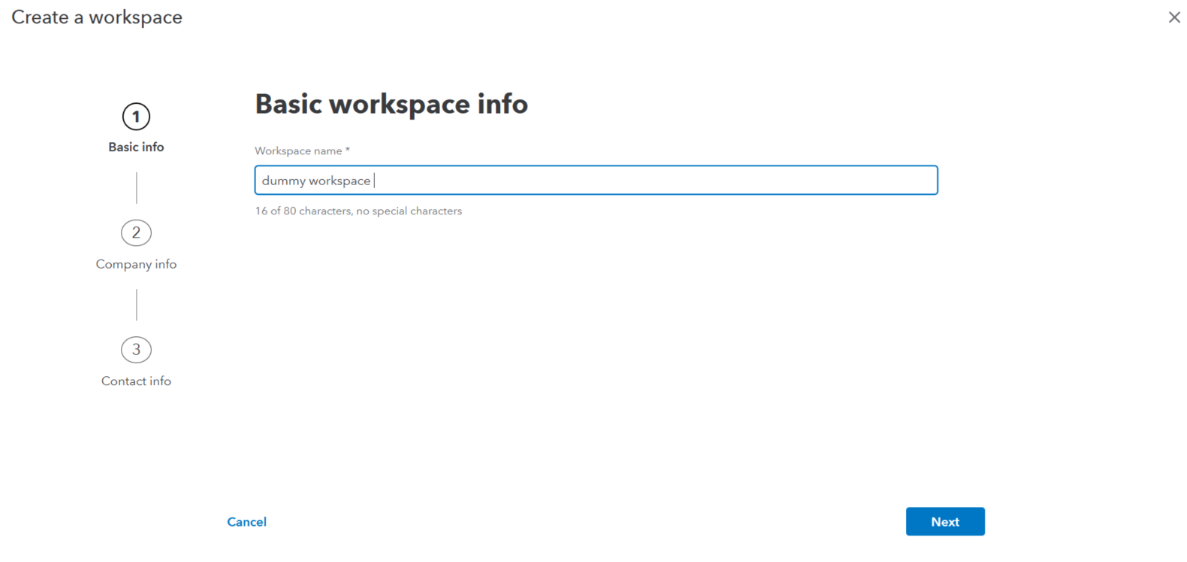 4. Enter the workspace name (example: Axoma Quickbooks Integration)
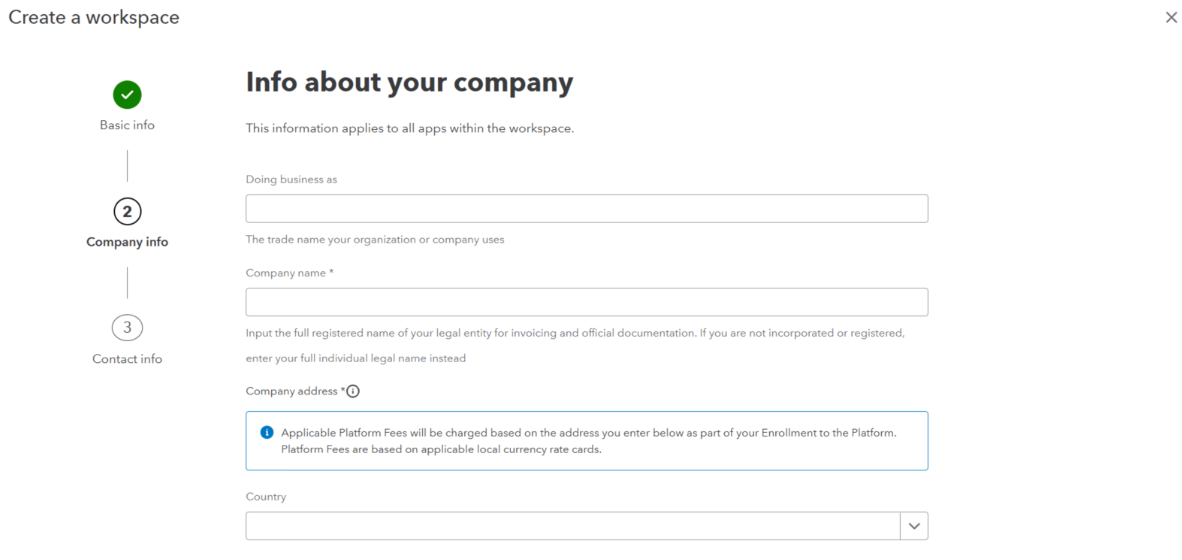 5. Add your company details.
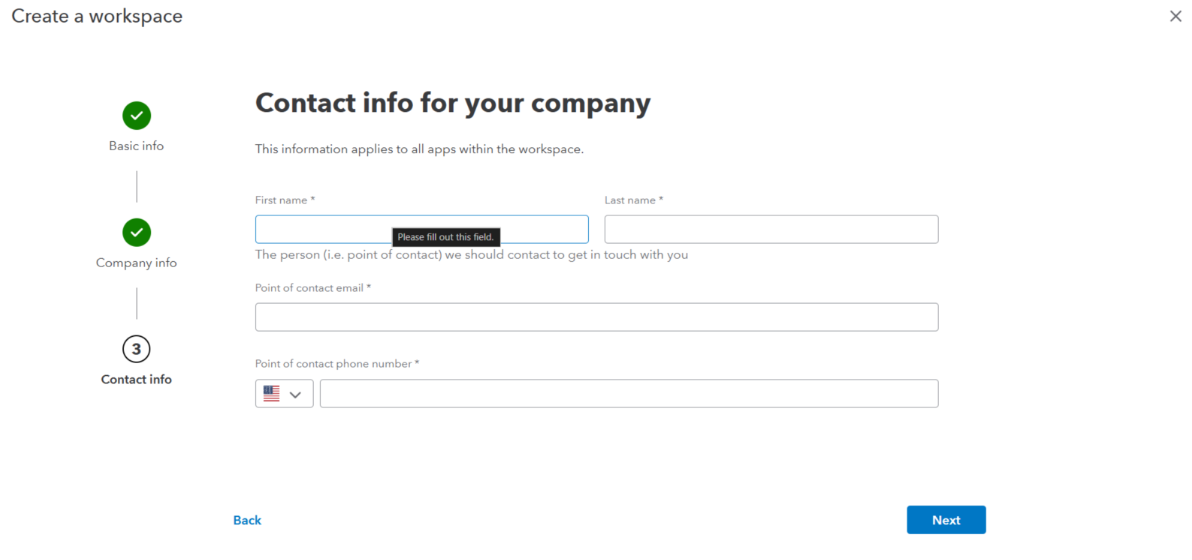 6. Add company contact persons details.
7. Click Next
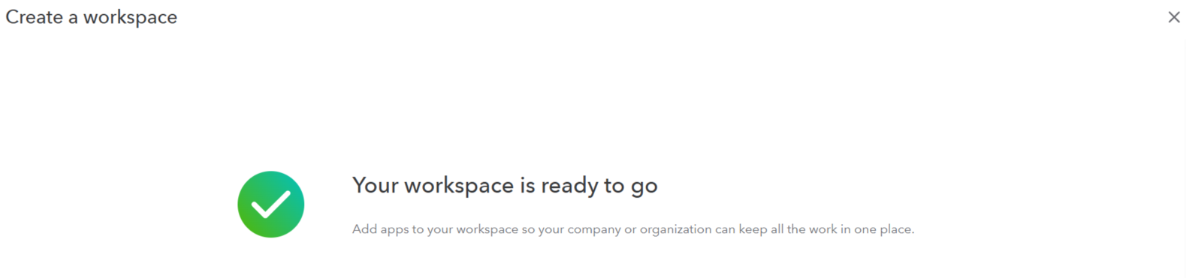
8. You will see a success screen
6. Add company contact persons details.
7. Click Next
8. You will see a success screen
 ## 🔹 Step 2: Create App and Required Credentials
After successful workspace creation, select the created workspace and create app.
1. Click on “+” to create an App.
## 🔹 Step 2: Create App and Required Credentials
After successful workspace creation, select the created workspace and create app.
1. Click on “+” to create an App.
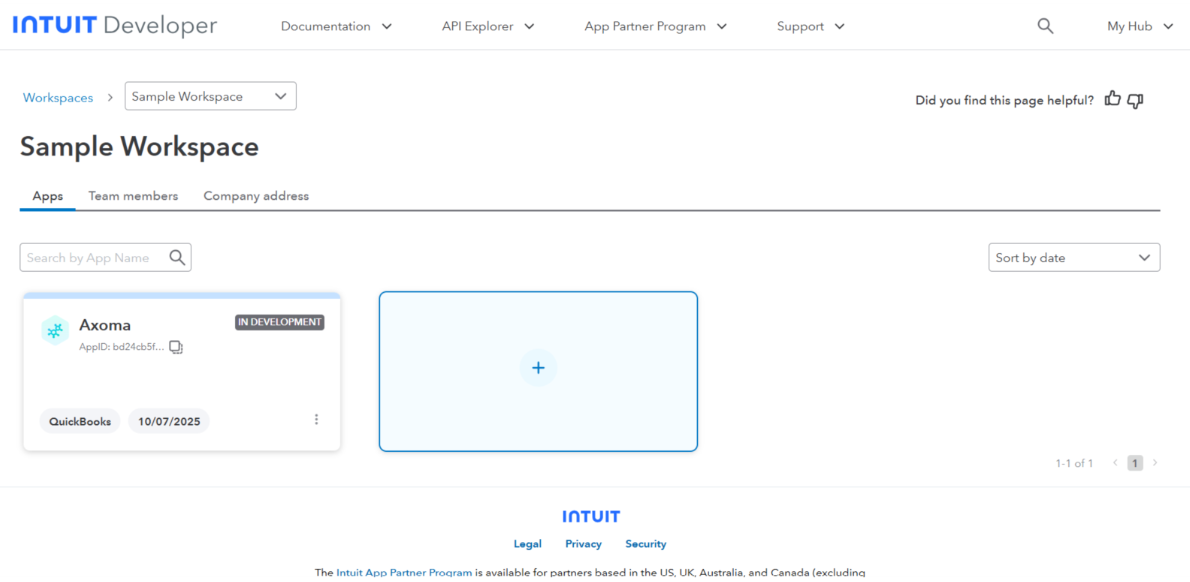 2. Select app type and click next.
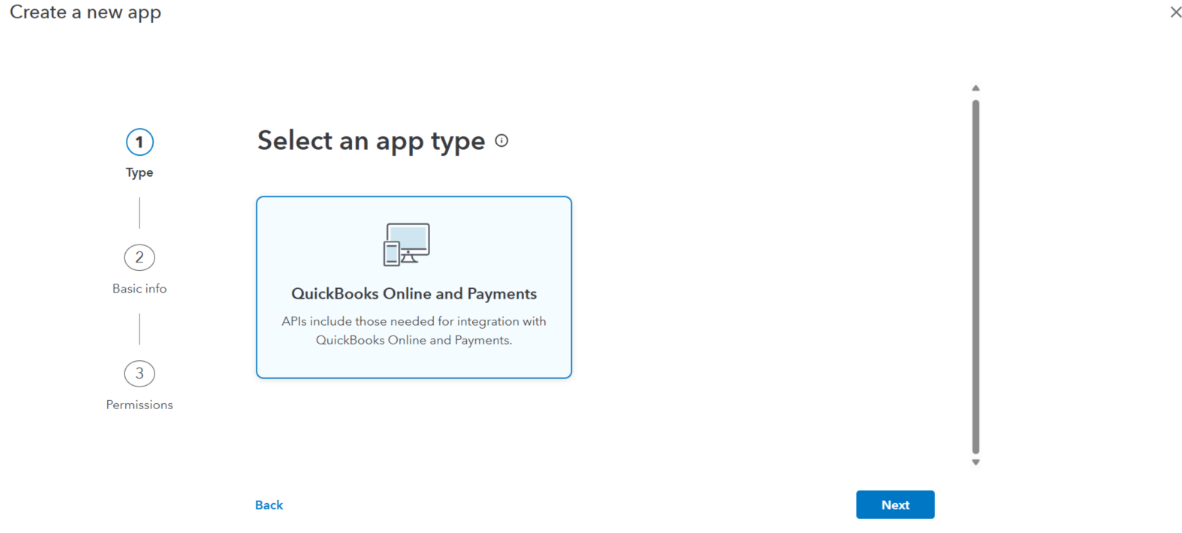 3. Add app name.
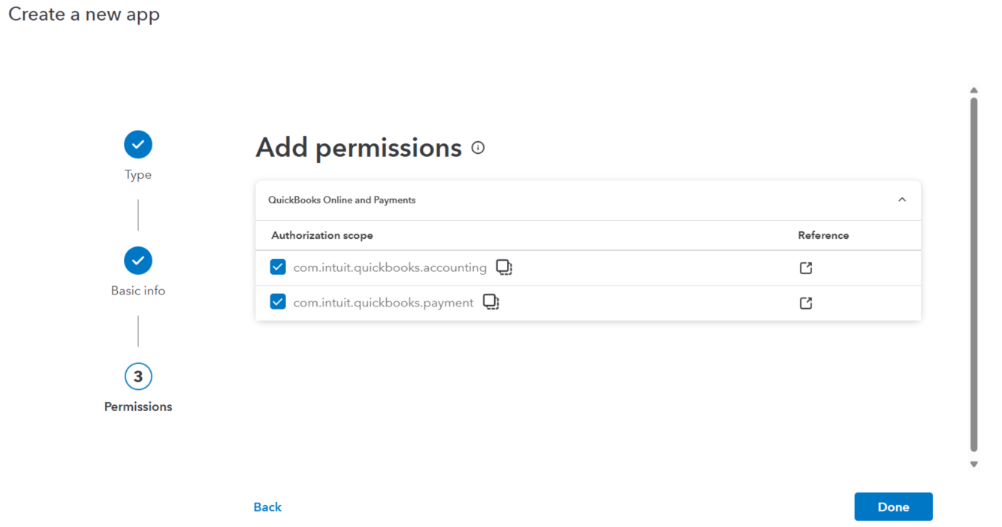
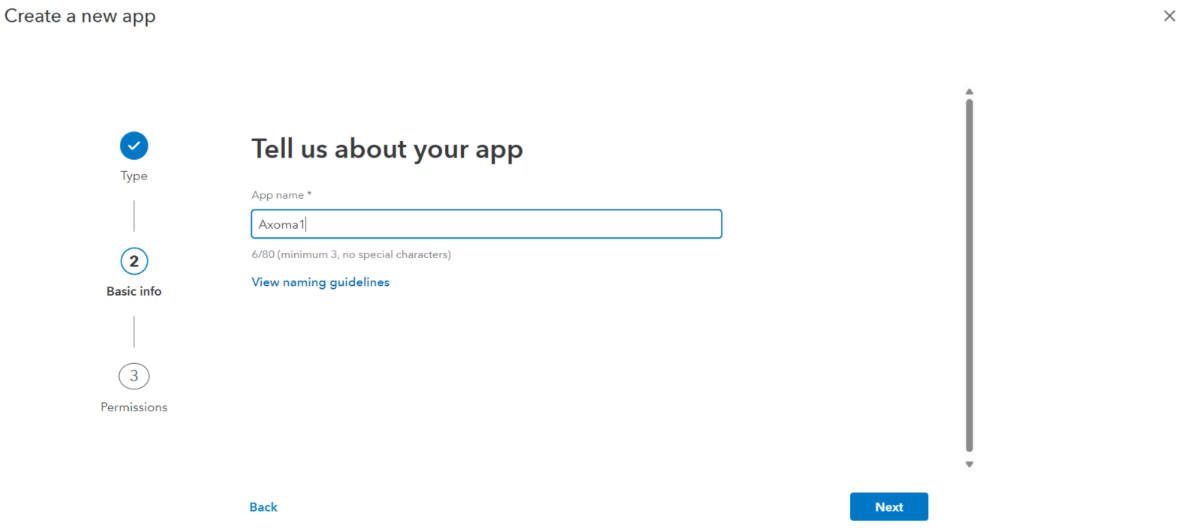 4. Add the required permissions as shown below.
 5. Confirm the permissions.
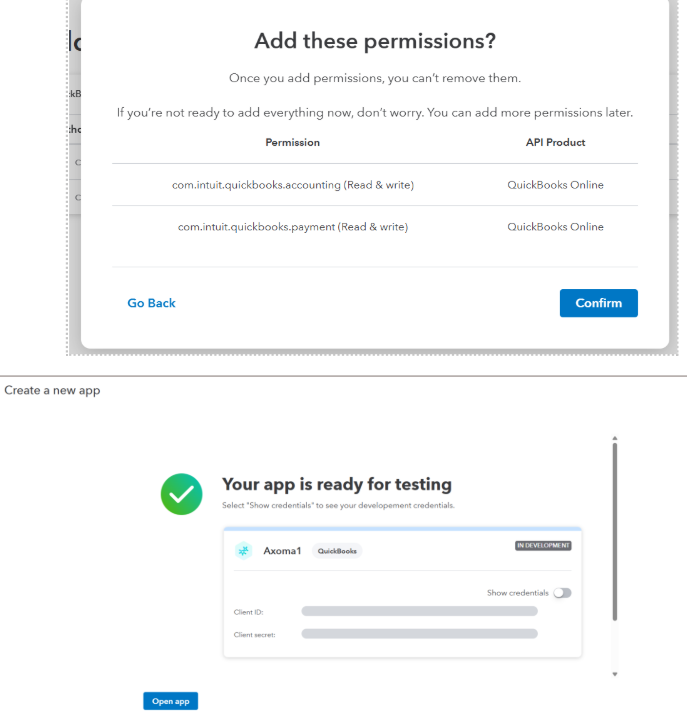 6. App created successfully. Now toggle show credentials to get the client id and client secret. And copy them.
## 🔹 Step 3: Add settings like redirect URI
1. Select the desired APP.
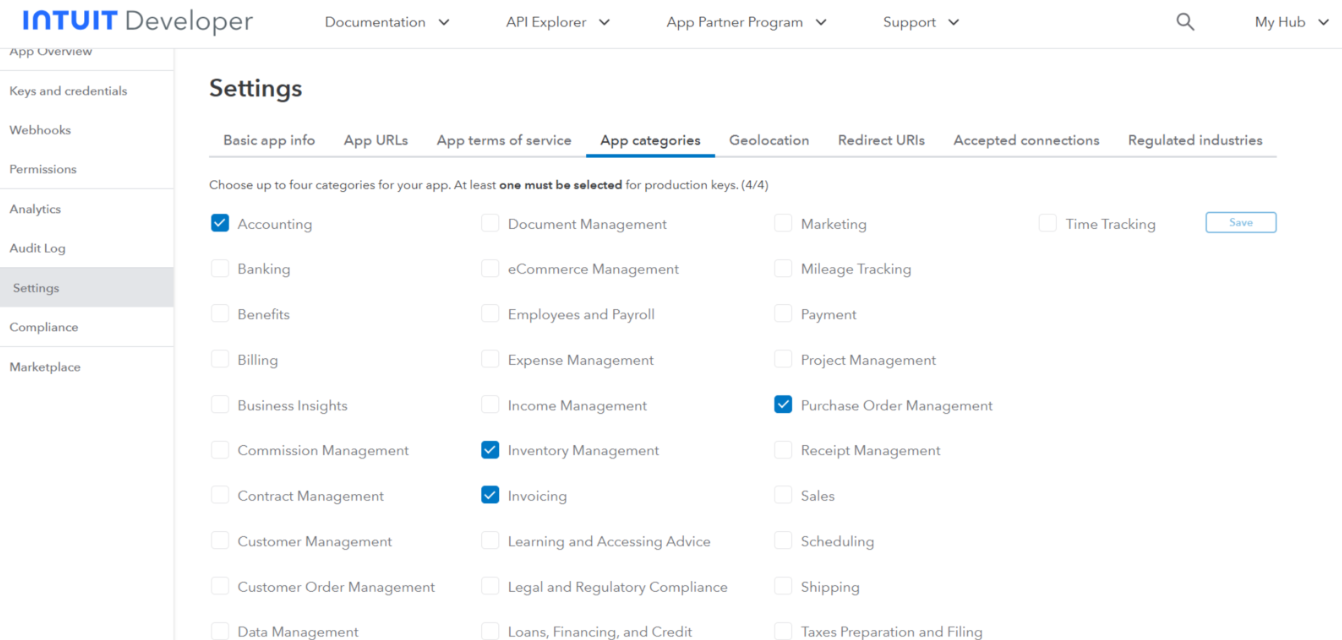
2. From the left corner select Settings --> App Categories.
3. Check boxes in front of Accounting, Inventory Management, Invoicing, Purchase Order Management.
6. App created successfully. Now toggle show credentials to get the client id and client secret. And copy them.
## 🔹 Step 3: Add settings like redirect URI
1. Select the desired APP.
2. From the left corner select Settings --> App Categories.
3. Check boxes in front of Accounting, Inventory Management, Invoicing, Purchase Order Management.
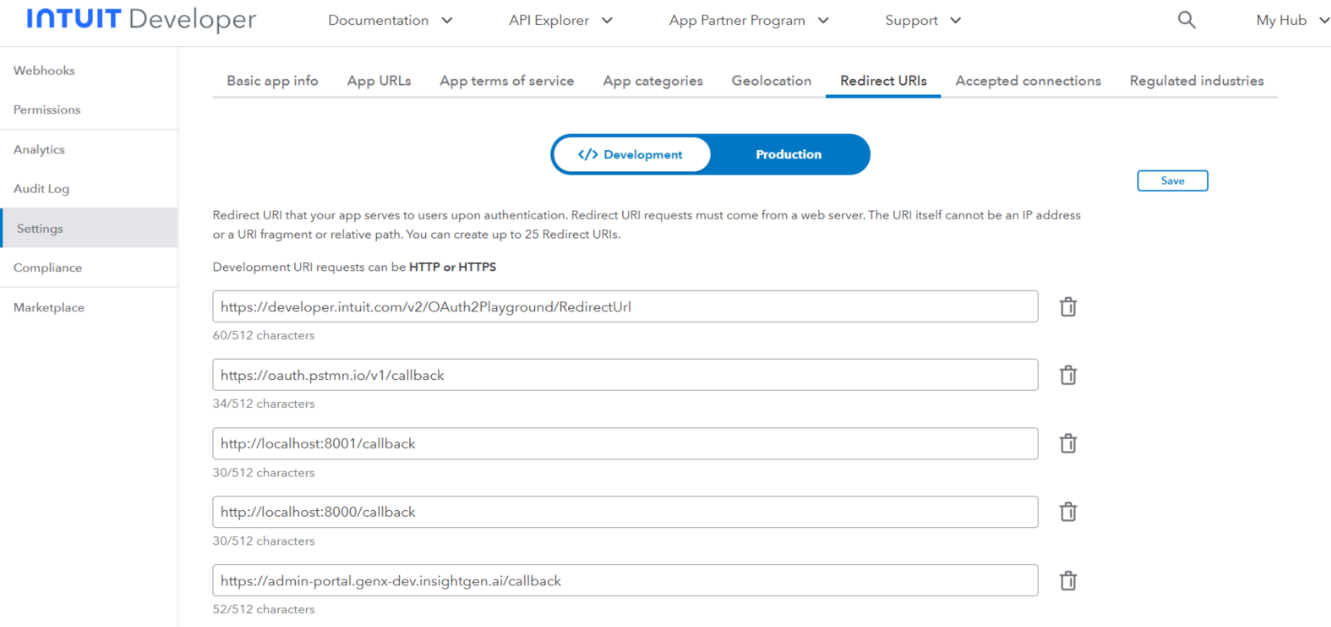
 4. Now select Redirect URIs add [https://admin-portal.genx-dev.insightgen.ai/callback](https://admin-portal.genx-dev.insightgen.ai/callback) and click Save.
 ## 🔹Step 4: Configure in Axoma Agent Studio
1. Navigate to Step 2 ➜ Tool Selection.
2. Select QuickBooks
3. Enter:
* Client ID
* Client Secret
* Environment
4. Proceed to Step 3 and enable the required toggles/features
5. Go to Step 4 ➜ Try & Publish
6. Provide a valid LLM gateway Key.
7. Test with example prompts
Example Prompts to Test in Axoma Playground
| **Use Case** | **Example Prompt** |
| -------------------------------------------- | ------------------------------------------------------------------------------------------------------------------- |
| **Fetch all the available customer details** | List Customers. |
| **Create a new customer** | Create a new customer with display name P\&C Services. |
| **Get details of vendor/customer** | Give me details for customer P\&C Services. |
| **Update customer details** | Update the address details for customer P\&C Services. New address will be 5396 North Reese Avenue, Fresno CA 93722 |
| **Get Invoice details.** | list all invoices for customer P\&C Services (103). |
## Outcome
Once the setup is completed:
* Users can Create customer/vendors update their details.
* Can create invoices and purchase orders also the details can be fetched and updated.
* For utility functions unpaid bills can be fetched with details, list of line items can be fetched.
* Enables seamless collaboration inside the Axoma platform
## 🔹Step 4: Configure in Axoma Agent Studio
1. Navigate to Step 2 ➜ Tool Selection.
2. Select QuickBooks
3. Enter:
* Client ID
* Client Secret
* Environment
4. Proceed to Step 3 and enable the required toggles/features
5. Go to Step 4 ➜ Try & Publish
6. Provide a valid LLM gateway Key.
7. Test with example prompts
Example Prompts to Test in Axoma Playground
| **Use Case** | **Example Prompt** |
| -------------------------------------------- | ------------------------------------------------------------------------------------------------------------------- |
| **Fetch all the available customer details** | List Customers. |
| **Create a new customer** | Create a new customer with display name P\&C Services. |
| **Get details of vendor/customer** | Give me details for customer P\&C Services. |
| **Update customer details** | Update the address details for customer P\&C Services. New address will be 5396 North Reese Avenue, Fresno CA 93722 |
| **Get Invoice details.** | list all invoices for customer P\&C Services (103). |
## Outcome
Once the setup is completed:
* Users can Create customer/vendors update their details.
* Can create invoices and purchase orders also the details can be fetched and updated.
* For utility functions unpaid bills can be fetched with details, list of line items can be fetched.
* Enables seamless collaboration inside the Axoma platform